Archive | crafting RSS feed for this section

Art

11 Apr

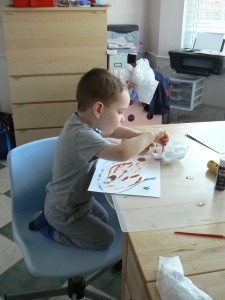
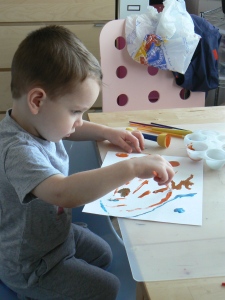
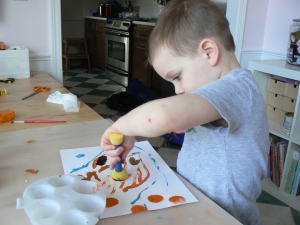
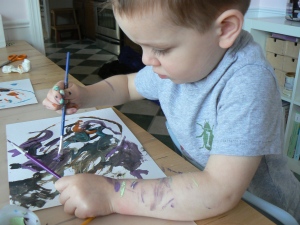
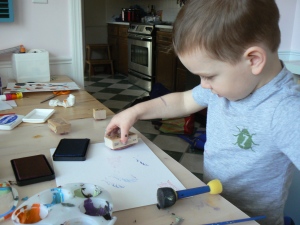
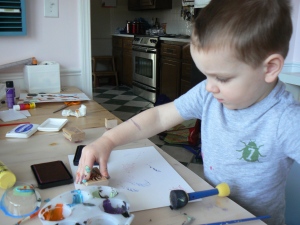
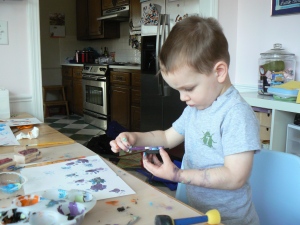
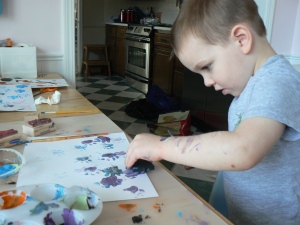
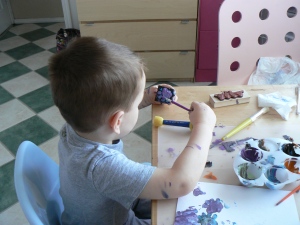
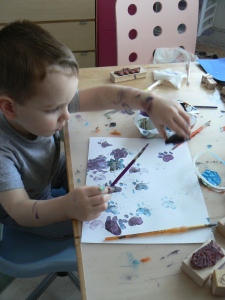
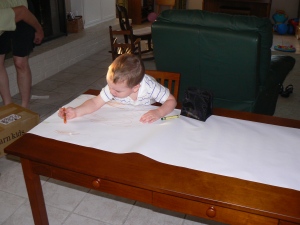
Alex loves to say,”No.”  Ask him almost any question, and the answer is usually no.  Just because.  So when I asked him the other day if he wanted to paint, I could see the no on the tip of his tongue, but right before he said it, he realized what I’d asked.  An emphatic, “Yes!” came out instead.  He loves to paint.  Part of the thrill is getting to sit at my table in my craft room.  The craft room holds such wonders for him, and he loves to explore, digging through all my drawers, delighting in the things he finds.  I really should be better about taking the time to let him use my materials, but because his art projects usually make a huge mess, I’m too often unwilling to take the time to deal with it.  I need to just get over that.

I changed him into his painting clothes.  He refuses to wear a smock, so he has an outfit I bought super cheap that he wears and can slop paint all over.  Then I set him up with several brushes and paint colors (I let him use my acrylics) and let him go at it.  He gets very serious about his paintings, and I just love watching his little face as he thinks about what colors he wants to use, which brush he needs, and where he’s going to place it on the paper.  I’ve shown him how to use a few things, but beyond that, I let him do whatever he wants without coaching.

Child art is a beautiful thing.

P1060708 P1060709 P1060711 P1060714 P1060715 P1060716 P1060718 P1060719 P1060721 P1060725

Cardboard Stove

26 Jan

We bought Alex a really cute little cooking set and play food for Christmas.  He enjoys it, but he hasn’t really known how to play with it.  When I cook, I use a stove.  He’s great with imagination, but I realized the cookware would make more sense to him if he had his own little stove for cooking.

What I didn’t want to do is spend money on a play stove.  Alex has so many toys as it is.  I didn’t want to put down cash on even more stuff.  I figured a cardboard box could work nicely, so I searched Pinterest to see if anyone else had had the same idea.  I found several cardboard stoves on there, and used a few different photos for inspiration.

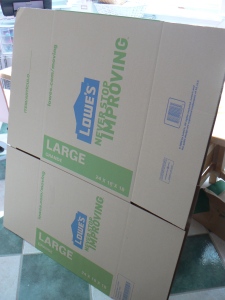
I started with a large moving box.  I did have to buy this, as we got rid of all our moving boxes last year.

P1060561

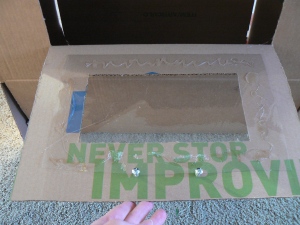
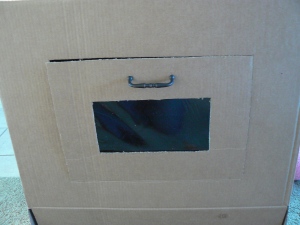
I hot glued the top of the box to keep it closed and give the box its shape while I worked on it.  I used a box cutter to cut out a door for the oven.  I also cut a window into the door and hot glued a piece of clear vinyl over it.  (The vinyl was leftover from one of Steven’s projects.)  For a handle, I used a cabinet pull that I’d bought shortly after we purchased our house.  I’d brought it home to see if I liked it for our cabinets.  I did, but after counting how many we’d have to buy and replace, that project was tabled for a while.

P1060565

Ninja and Theo can't resist a box

Ninja and Theo can’t resist a box

P1060564

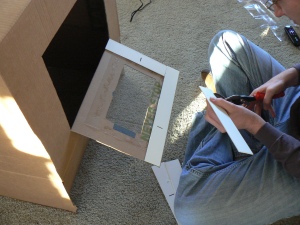
Steven got involved at this point.  He was concerned about the structural integrity of the cardboard.  It’s for a rambunctious 2-year-old, after all, so he figured it should be reinforced.  He grabbed some vinyl slats leftover after he shortened some window blinds and cut them to fit around the door of the oven.  He also fitted slats on the inside of the box around the door so that the door can’t be shoved in.  Additionally, he added a magnet and a small piece of metal to keep the door latched shut.

P1060566

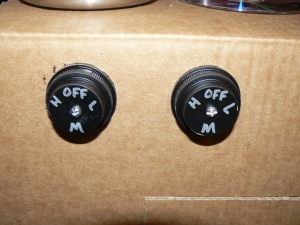
I’ve been crazy sick lately and on a ton of prescriptions.  That meant that I had a lot of medicine bottles I’ve recently emptied.  I used the lids to make knobs for the stove.  I had some leftover chalkboard spray paint from another project, so I used that to paint the lids, then I used a metallic sharpie to write on them.  Steven drilled holes for me.  Then he figured this would also need reinforcement, so he used more blind slats inside the box where the knobs would go.  This meant he had to use his drill to make holes in the box for the knobs.  For the knobs to spin, they needed washers or nuts or something behind them, and Steven didn’t have any small enough, so that did require another trip to Lowe’s for a 99-cent bag of thingamajigs.

P1060572

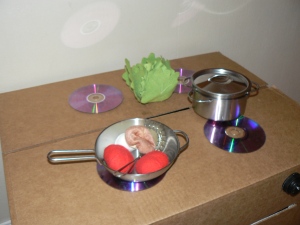
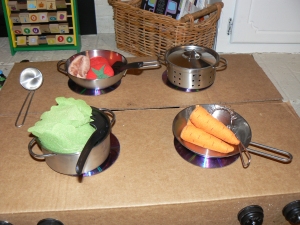
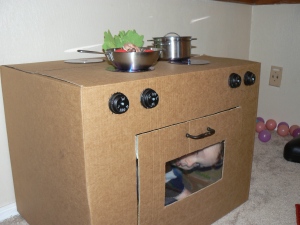
I saw on Pinterest that several people used CDs for burners on their homemade stoves.  I thought that was brilliant, so Steven dug up some unused CDs for me to hot glue on the top.  I didn’t do anything fancy to the top of the stove, so it’s not terribly impressive with the obvious line across the top, but I’m okay with that.  It’s just a little play stove, and Alex doesn’t care.

P1060591

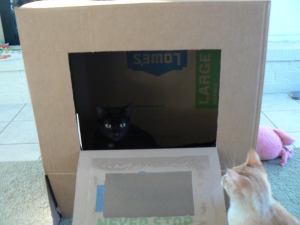
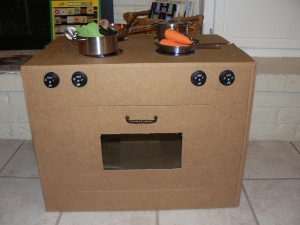
I’m quite pleased with the finished result, and Alex thinks it’s pretty fun, too.

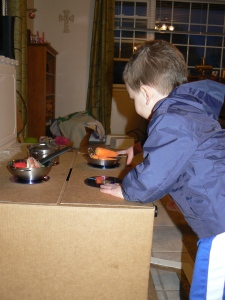
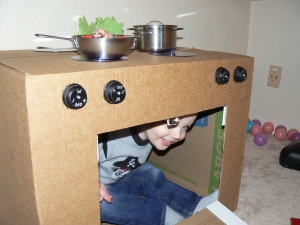
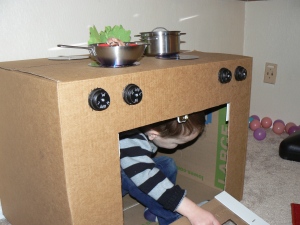
P1060569 P1060570_edited-1 P1060578 P1060579

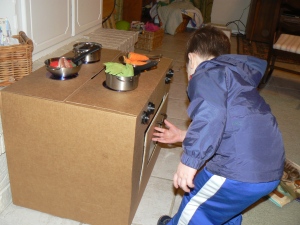
Of course, the best part about it is getting to climb inside.

P1060588 P1060589 P1060590

This was a lot of fun to make, and I love that it was so inexpensive.  The total cost was under $3.

The Toddler and My Craft Room

24 Oct

I had a question in the comments of my craft room re-do post about how I keep my toddler from getting into my stuff in my craft room.  Short answer: I don’t.  At least, not completely.  We do have a baby gate over the doorway into the kitchen, and you have to go through the kitchen to get to the craft room. That means Alex doesn’t always have free rein in the house.  However, the craft room is next to the laundry room, and we have to go through the laundry room to get to the garage.  That means that any time we go somewhere, we go through my room.  Alex almost always stops to open a drawer and grab some stuff.  I find my craft things all over the house sometimes.  Or in the car.

I found pipe cleaners in the kitchen.

I found pipe cleaners in the kitchen.

Craft felt strewn about.  You'd be surprised how many times my child insists he has to bring an armful of felt with him when we go somewhere.

Craft felt strewn about. You’d be surprised how many times my child insists he has to bring an armful of felt with him when we go somewhere.

More pipe cleaners, some stuffed animals, and other mess thrown about my work area by the toddler

More pipe cleaners, some stuffed animals, and other mess thrown about my work area by the toddler

I used to get pretty frustrated that he wouldn’t leave my stuff alone.  So, I changed my storage up a bit.  I moved anything dangerous or disastrously messy out of his reach.  Then I put stuff that I don’t mind him messing with in some of the drawers.  He figured out pretty quickly which drawers are his to play in, and he leaves my other drawers alone.  This made things so much more peaceful for both of us, as I don’t constantly have to pry things out of that death grip he has, and he doesn’t end up in frustrated, angry tears because I took stuff away.  He’s a curious toddler, so I figure it’s better to give him things he can dig around in, rather than fight with him every time we’re in that room.  The drawer pictured above with the craft felt?  That’s his.

He likes sponges, so even though I use this stuff, he's allowed to play with it.  And tongue depressors are just super cool--as long as his doctor isn't using one to check his throat for strep.

He likes sponges, so even though I use this stuff, he’s allowed to play with it. And tongue depressors are just super cool–as long as his doctor isn’t using one to check his throat for strep.

And finally, I added a little more hidden storage where I can place things up high and out of his reach.  The door leading into the laundry room is always kept open, as the cats’ litterbox is in there, and they need to have access to it at all times.  It was a great place to keep things hidden–until the toddler started messing with the door one day and discovered this new treasure trove!  I’ve had to move a few more things (hello glue sticks all over my house!), but for the most part, he leaves all that stuff alone.

P1060214 P1060215

This is what’s working for us right now.  I may need to change a few things up in the future, but for now, this is good.

Christmas Ornaments

8 Oct

I had another wedding shower to send a gift to.  (My attendance would have required a trip to Texas, something I would have loved to do, but it’s inconvenient and expensive.)  In addition to sending a regular gift, I made a Christmas ornament for the couple’s first Christmas tree.  Like last time, I went for a bluebird of happiness, but I changed things up a bit.  First, this shower was for the sister of the young man I previously made an ornament for.  I didn’t want to do something identical.  Second, this one fits the recipient better than the first one would have.  Third, it turns out that I like this one better.

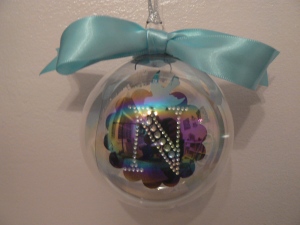
I used the same technique of gluing my design to a piece of acetate, which is then rolled up and placed inside a glass ornament.  Unfortunately, I didn’t realize that I purchased iridescent glass rather than clear glass until it was too late.  So the photos are not as clear as I would like.  I used the initial of the couple’s soon-to-be joint last name, added a punched-out bluebird, and voila!

P1060011 P1060014

While I was at it, I made an ornament for my own tree.  I either buy or make an ornament each year for my husband and me.  Since having Alex, I now do the same for him so that he’ll have a collection of ornaments to take with him when he’s all grown up and leaves home.  Because coloring has become one of his favorite pastimes, I wanted to preserve some of his early artwork in some way.  But let’s be honest; a toddler’s scribbles aren’t exactly frame-worthy.  However, they are definitely ornament worthy.

I punched several heart shapes out of one of his drawings.  I folded each heart in half, then glued the hearts to each other, essentially making a bit of a fan.  I then glued the hearts to a piece of acetate and rolled it all up and put it into an ornament.  Add ribbon, and it’s done.  Beautifully preserved artwork from my favorite little person.

P1060066

This one is mine, but I’m going to make a second one for Alex’s collection, as I think it well sums up the thing he has been most into in 2013: crayons!

Summer Recap

30 Aug

While it hasn’t been a terribly busy summer, it has been eventful.

We took an awesome family trip to Vail, CO.
P1050754

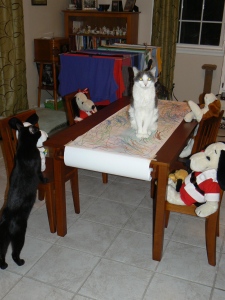
Alex received a craft table and chairs from his grandparents.  Coloring is now Alex’s favorite activity.  I’ve loved it, too, once we worked past his desire to color all the furniture, the windows, and the TV.  (Thank God for washable crayons!)

P1050785 P1050788 P1050791 P1050792 P1050795 P1050797


Alex has been having a blast with his little pool in the backyard.

P1050443 - Copy - Copy P1050448


Alex met his cousins for the first time.

P1050434_edited-1


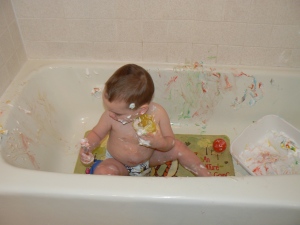
I set Alex up in the bathtub with shaving cream mixed with food coloring and let him go at it.

P1050600 P1050602 P1050606 P1050611 P1050612


My long-suffering cats have been hugged and pretend fed by Alex.  Doogie usually runs away, but he got hugged by Alex a couple of weeks ago when he was frozen in place, puking.  Insult to injury.  Alex saw an opening to hug a cat, and he took it.  Poor Doogie.  That’s okay.  He’s enjoyed playing Lord of the Dogs with the new craft table.

P1050800 P1050808


And finally, we’ve survived a bout with scarlet fever, regular strep, a stomach bug (me), and a very nasty mystery illness that resulted in high fever followed by a blistered, oozing rash.  That last one took down both Alex and my husband.  It’s been a not-fun couple of weeks around here.  Hoping for better health come fall.

P1050802

Scarlet Fever and Other Summer Activities

28 Jun

Guess who has strep yet again?  That’s right–my kid!  This time, it’s so bad that the diagnosis was upgraded to Scarlet Fever.  Sounds ominous, but it’s really just strep with a rash and high fever.  Alex was up around 105 degrees on Tuesday morning, which scared me horribly.  He really felt dreadful.  Three days later, he feels better, but he’s still running a low-grade fever, and his rash has spread to his entire body.  He could play an alien on Star Trek without needing make-up.  Spots are running all around his face and wrapping around his neck. (And behind his ears, and all over his chest and back, and in the diaper area, and down his legs…)

We’ve been stuck inside all week.  To make things worse, I signed up to work VBS at church this week, and that takes place in the evenings.  I don’t really know what I was thinking, seeing as I don’t particularly like little kids.  I’m with 4th and 5th graders, and my group is all boys.  They’re making me fear the future when my son is older.  Boys that age are… interesting.  Loud, obnoxious, full of themselves, somewhat incapable of following instructions.  So, sort of like my toddler in much larger form.  Except my kid isn’t obnoxious.  Yet.

All this means that I’m with a cranky toddler who doesn’t feel well all day, then I go and hang out with a bunch of wild kids in the evenings.  Running errands?  I fit that in whenever possible.  As Steven was leaving for work the other day, he told me that the cat litter situation was getting dire.  I gave him a blank look and said (with some admitted snark), “What do you think I can do about it?”  I had an insanely sick and contagious toddler on my hands.  It’s not like I could pack him up and run to the store with him.  Instead, Steven came home for lunch, and I raced out the door to buy litter before he had to go back to work.  That’s pretty much been my week.  Alex is almost out of almond milk?  Run to the store at 9:30 pm.

Yesterday, I took a nap.  My Danged Tile did not get cleaned as per the Thursday schedule.  I didn’t regret that decision yesterday, but I kind of do today, as it still needs to be done.   That extra sleep was so needed, though.  Alex has been crying out in his fevered sleep a lot, which means I wake up every time he does.  I’m tired.

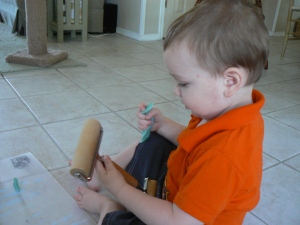
Because I wanted PBS turned off this morning for a while (I’ve been a lax parent this week and have let Alex watch WAY too much TV while sick), I decided to try making homemade play-doh.  It was amazingly simple to make, and I’d bought some food coloring a while back just for this purpose.  Alex was perplexed by it at first, but then he got the hang of it.  More or less.  He was into taking it away from me, smashing it with a rolling pin, and organizing it in containers.  This kid loves to organize.  Boy after my own heart!

P1050475 P1050483 P1050484 P1050489

I’m kind of looking forward to the weekend when I’ll have some help.  That means I can escape… to the grocery store.

Handmade Wedding Gift

24 May

One of our former youth back home in Texas is getting married soon.  These kids grow up too fast, as it doesn’t seem possible that any of them can now be college graduates and getting married!  But they have grown up, and now we’re past graduation gifts and into weddings.

I typically do something for the home, like towels or kitchen items.  I did buy bowls.  Really fun confetti bowls, actually.  But I wanted to do something a little more personal, as well.  I remember the first Christmas Steven and I had together after we were married.  We went out and bought a special ornament together for our first tree.  I also unwrapped an entire box of ornaments that my mom had saved from my childhood.  Lots of great memories.  Steven stood and looked on sadly as I gleefully unwrapped all my special ornaments because he had none.  They didn’t do Christmas trees in his house when he was growing up.   Isn’t that terribly sad?

I don’t know whether or not this young man and his fiancee have ornaments from their own childhoods for a tree or not, but I wanted to make sure that they have at least one ornament waiting for them for their first Christmas tree.

I didn’t want to do anything overtly Christmas-y.  I don’t know about you, but I’m not really into snowmen or Santas or other typical Christmas scenes.  I’m not against them, but they don’t really have any special meaning.  Nor did I want to do something lame like cut up their wedding invitation and put it into a Christmas ball.  Not only is that not very attractive, but to me, it’s like giving someone their invitation in a frame; it comes across as cheap and not very creative.  (I’m a strong believer that couples will save their invitations and other wedding mementos in their own way that befits their own style.)

I went more with a (loose) theme of love, home, and happiness.  I opted for a bluebird of happiness.  The old story goes that two young children went all over the place looking for the bluebird of happiness, only to go home and find it there.  So this was my Christmas-ornament interpretation of that:

P1050022 P1050026 P1050029


The secret to getting the bird in there is acetate.  I’ve tried in the past to get paper inside one of these glass ornaments, and it was a disaster.  The paper didn’t want to unroll properly once inside, and it looked crumpled and messy.  I searched a long time online one night and ran across this tutorial, which neatly explained how to do what I wanted to do.  The one change I would make to the instructions is to buy acetate in the specialty craft paper section of the craft store.  (I bought mine at Hobby Lobby.)  The instructions say to use overhead projector sheets, but as a former teacher, I can tell you that they yellow.  Badly.  One summer in a Texas attic, and that ornament will be ruined.  (Although, admittedly, I don’t know how the stuff from the craft section will fare.  I’m just hoping it’s better, as it appears to be made of much sturdier stuff.)

A little touch I added was to use shrink plastic to cut out their initial.  (Remember Shrinky Dinks?  Yeah, that stuff.)  I cut their initial out with my Sizzix, colored it in with some Tim Holtz Distress Stain, punched a hole in it, then put it in the toaster oven to shrink.  I then threaded some ribbon through it and attached it to the top of the ornament like a little charm.

I also changed things up by using seed beads inside the ornament, instead of glitter.  The beads can rattle around in there, but they won’t stick to the glass like glitter does.  This was super important, as the ornament had to be shipped from Oklahoma to Texas.

I like big, fluffy bows, so I added that to the top.  As for the bird itself, I used a Martha Stewart stamp and watercolor pencils to color it in like an Eastern Bluebird, which I’m fully aware the stamp is not.  It gets the point across, regardless.

I sent it to a friend back home to take to the church shower for me, as I couldn’t be there.  I’ve already heard some nice things about it, so I think it was a success!

DIY Mother’s Day Corsage

7 May

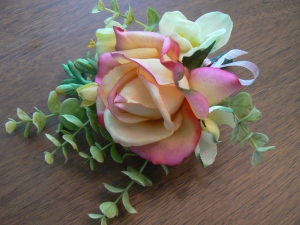
We always give my MIL a corsage for Mother’s Day.  We could do that inexpensively when we lived in Texas, as we’d just pick one out at the store and drive it over to her house.  Last year we were in Oklahoma for Mother’s Day, and we learned how unbelievably expensive it is to have a corsage made and delivered.  Ouch!  My husband works for a non-profit Christian organization here.  He took a very large paycut to work for this ministry we’re passionate about, and that means we really have had to cut expenses.  I started looking online for an alternative to having flowers delivered.

I first googled “DIY Mother’s Day corsage,” but that kept leading me to a felt flower corsage.  While lovely, I had no desire to cut little pieces of felt and sew or glue them together.  What’s more, I wasn’t sure MIL would care for that as much as something more realistic.  So I changed my search to “DIY corsage” and found this.  Looked easy enough, so I headed to Hobby Lobby to buy the supplies.

FYI, if you didn’t know, they sell realistic-looking flowers.  They’re even labeled as such and have minor imperfections like a real flower, as well as a realistic feel.  I bought all my flowers on a 50%-off sale, bought the wire and floral tape at Dollar Tree, and used a 40%-off coupon for corsage pins, so that brought the total cost to around $11.

Not only did the tutorial make it look easy, it really was easy!  I put a corsage together in under 10 minutes.  As a mama who can only get things done during her busy toddler’s nap, this was wonderful!  The corsage turned out beautifully, and when Steven hand-delivered it to his mom last night (he’s in Dallas on business), she didn’t even know it wasn’t real until he told her!  I’d call that a definite win.

P1050151 P1050152 P1050155 P1050157 P1050154

(I did spend a little beyond the cost of corsage supplies to buy a box and some yellow ribbon for packaging, but it was only about $3 more, again with a coupon.)

Crafty Pursuits

11 Apr

Once upon a time, I made things.  These days, I rarely make anything except dinner.  But over the last few months, I’ve crafted a very small number of things.

I found some spare floor tiles in the shed after we moved in last spring.  I decided to use one to make a chalkboard for my sister for her birthday.  Her birthday is in October, so obviously, I made this a while back.  (When I say I rarely make anything anymore, I’m not kidding!  I have to collect it all here in one post, and there’s not much to show.)

P1040522

I liked how it turned out, so I made one for myself, too.  I used a Gorilla brand epoxy on the back to attach a wall hanger.  It looked fabulous hanging on my wall… for about a day.  The glue wasn’t strong enough, apparently, and I came home to a shattered chalkboard tile on my kitchen floor.  *sigh*  I didn’t even get a picture of mine, which was made on a green tile.

Moving on…  My niece, also with an October birthday, received a Junque Journal that I put together.  I watched videos on YouTube of how to make one.  It looked fun.  And easy.  Turns out, it was neither.  It was tedious to cut all that paper (and oh my word!  what a lot of paper!) and glue it in.  But ultimately, I really did like how it turned out.  I even used my distress stains on some white seam binding to create different-colored ribbons to use on it.  Good thing my niece is worth it!

P1040529 P1040528


And more recently, I put together Alex’s shoes from his first year and displayed them in a shadow box.  I whited out his name for privacy’s sake, but the bit of white paper in the center says, “Alex’s Full Name: The First Year.”  I love seeing the progression of sizes and that you can see when he started to crawl because the bigger shoes are all scuffed up.  I have no problem giving away his outgrown clothes, but there’s something about his darling little shoes that I have a terrible time parting with…

alex's-shoes


First Crafting Attempt with Baby

4 Feb

As I mentioned previously (several times *sigh*), we’ve been quite sick here.  That means we’ve been housebound.   The last round of illness meant we couldn’t even go outside.  Alex and I both had nasty coughs, and the cold outdoor air would have exacerbated things.  We were getting antsy inside…

I decided to do a craft with Alex.  I use the word craft loosely, as we didn’t really make anything.  He’s 16-months old, not coordinated, not prone to following directions, and he sticks everything in his mouth.  Kind of limits what we can do.

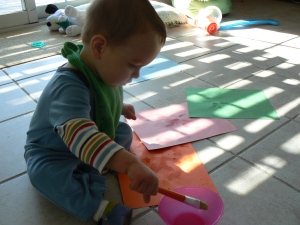
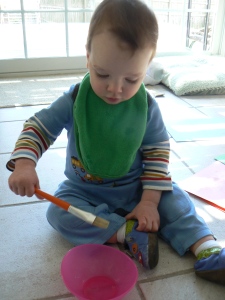
I pulled out some construction paper, a plastic bowl with a little water, and a couple of paint brushes.   I showed Alex what to do, and he got right to it.  Sort of.  He was all about dipping the paint brush in the water.  Then smacking it in the water.  Then flinging the brush about.  Sucking on the brush.  Attempting to “paint” the cat.  The sliding glass door.  The floor.  Oh, and then the paper.   Whatever.  He had fun, and it was just water.  This activity occupied him for about 30 minutes.  That’s like a week in toddler time!  Success!
P1040901 P1040904 P1040905 P1040908 P1040911 P1040913 P1040914 P1040917 P1040919 P1040921 P1040922 P1040923